

Introduction
End-to-end testing is the process of testing software or an application in a manner that mimics real-world usage by customers or end-users from start to finish.
Cypress is a robust e2e testing automation tool used to test web applications and it has a fast learning curve making it easy for testing newbies to pick up.
In this article, we will walk through setting up Cypress on a React application, write some basic tests, set up continuous integration through GitHub Actions, and see recorded tests on Cypress Cloud.
Cypress setup
I'm assuming we already have a React application running or you can create one using Vite by running npm create vite@latest
Install Cypress by running npm install cypress --save-dev on the terminal, then npx cypress open to access the Cypress environment locally.
Since this is the first setup, we have to configure the cypress environment.
We will be prompted to choose between E2E testing or Component testing. For this article, we'll opt for E2E testing.

Then proceed to select the specified config files outlined by Cypress for our project. Following this selection, we are presented with browser options for testing, and for this article, we'll opt to use Chrome.
Lastly, we choose if we want to create a new test spec or if we want to use Cypress scaffold example test specs. Let's opt to create a new spec.

Follow the prompts to create the test spec file and name it countdown.cy.js Cypress adds a Cypress folder that contains this file to the root of the React app folder.
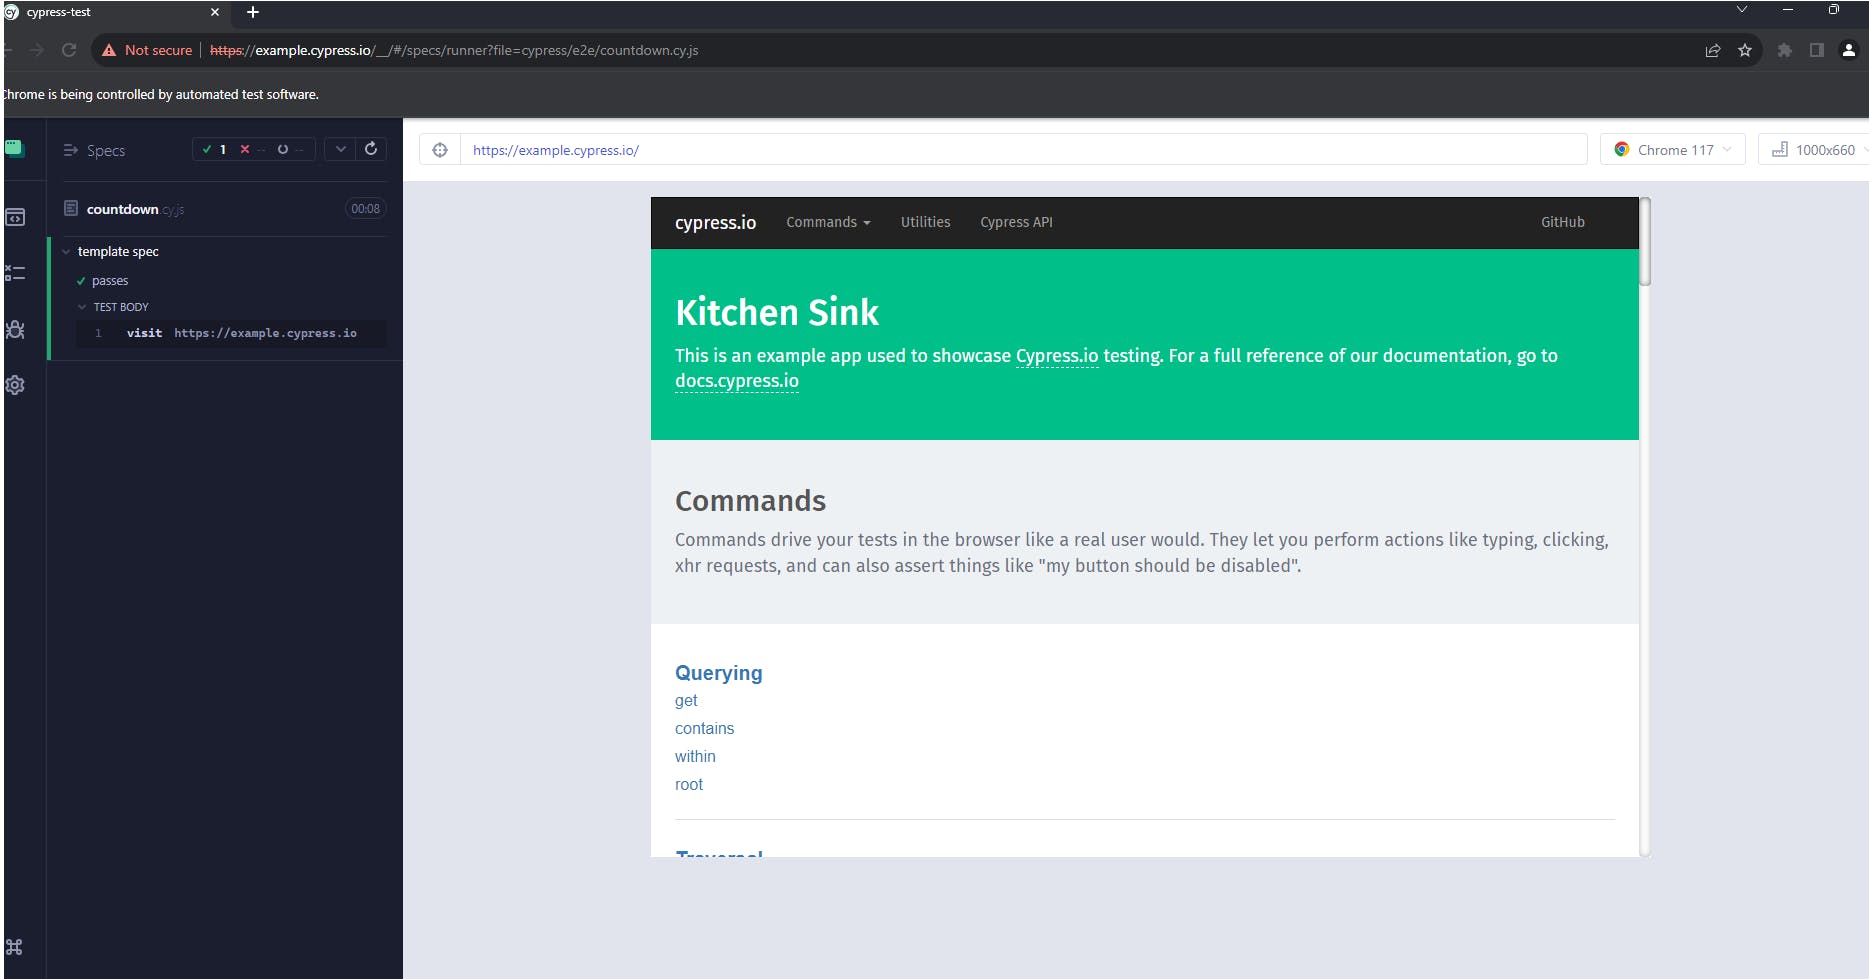
The test file runs an example test case successfully after its creation.
Cypress Commands
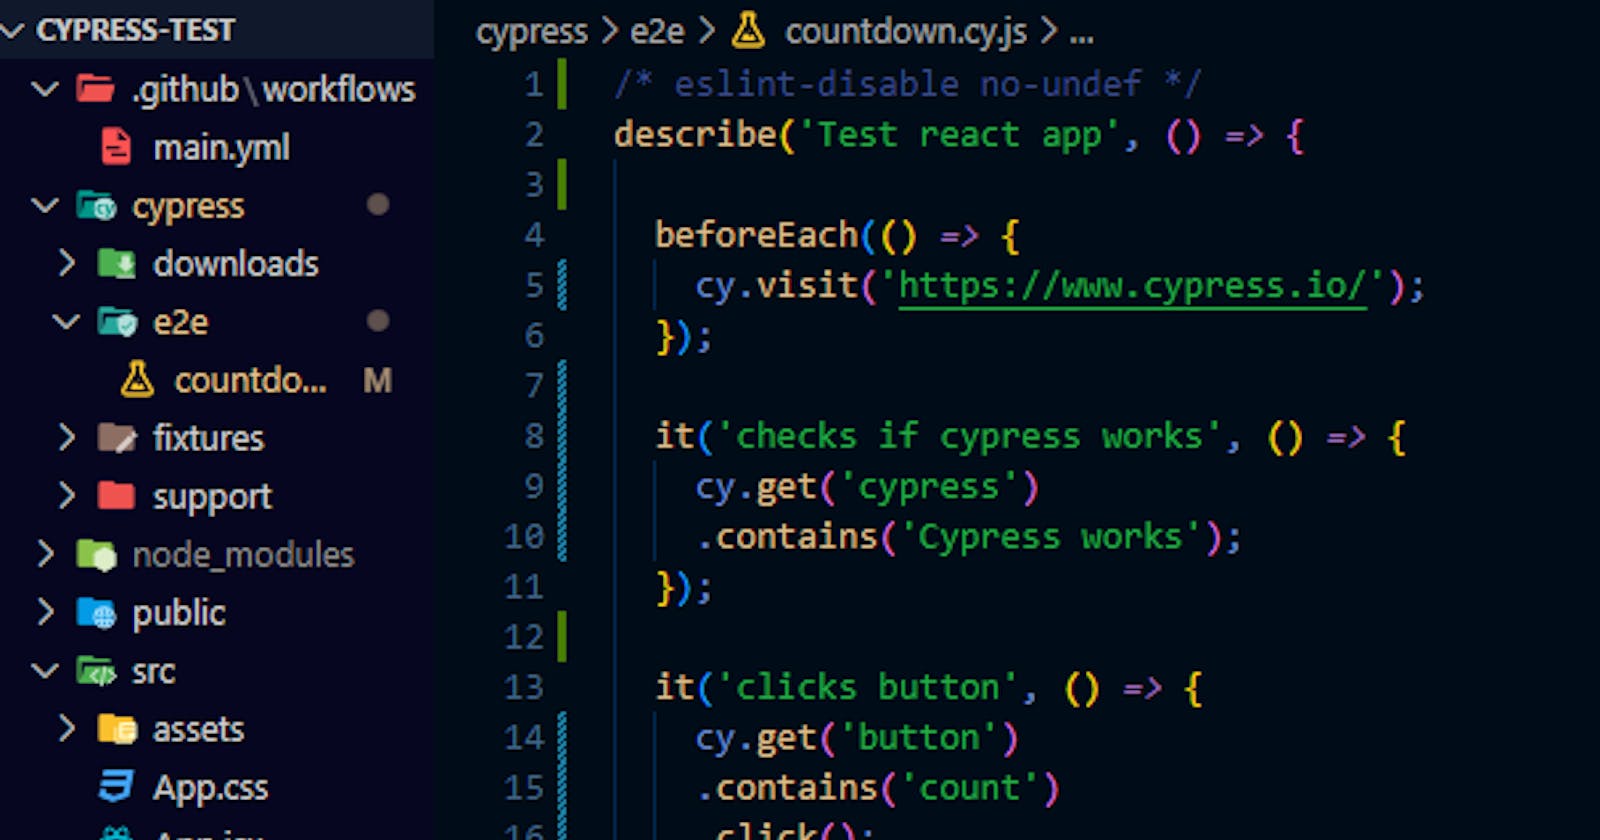
In VScode or whichever IDE is being used, navigate to the Cypress folder located at the root of the React app folder, we'll find the countdown.cy.js file inside the e2e folder.
We can see the example test case in the file.
describe('template spec', () => {
  it('passes', () => {
    cy.visit('https://example.cypress.io')
  })
})
describe()is used to group our test cases, it takes in two arguments. The first is the name of the test group and the second is a callback function. We can have multipledescribe()in one file.it()is used for an individual test case, it also takes in two arguments. The first is the name of the test case—best practice is to make this name readable—and the second is a call-back function. We can have multipleit()indescribe()cy.visit()simply navigates us to the URL provided. We can also use external URLs here.
You can see other cypress commands in the documentation.
Writing tests
In our IDE, You'll also see that a cypress.config.js file has been added to the root of the folder.
The cypress folder is structured this way
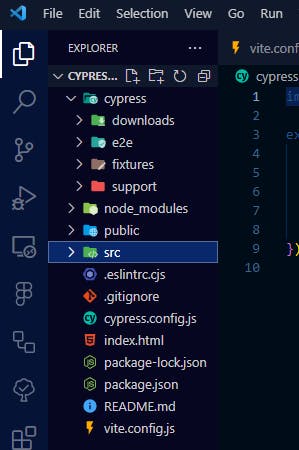
e2efolder holds all our test casessupportfolder holds all Cypress custom commandsfixturesfolder holds data we want to pass to Cypressdownloadsholds files downloaded during testing
We'll go into more detail when we start testing.
For this example, I've created a react app using Vite, and it comes with a countdown feature.

We are going to write a simple test that checks for Vite + React when we navigate to this page.
Cypress has easy-to-use commands for running a test. Earlier we used cy.visit() now we'll look at the cy.get() command.
The cy.get() command is used to access an element either through classes, IDs, data attributes, element name e.t.c
For this test to be successful, Cypress has to access the h1 element holding this text.
<h1>Vite + React</h1>
We can do this by simply using cy.get() to get the h1 element
describe('Test react app', () => {
  it('passes', () => {
    cy.get('h1').contains("Vite + React")
  })
})
If you check the Cypress environment you'll see that the test failed because it can't find the h1 tag.
One good feature Cypress has is that it gives clear definite error messages as to why a test fails.

Cypress doesn't know where to find the h1 tag.
We can modify this by directing Cypress to where it can find the h1 tag.
describe('Test react app', () => {
  it('passes', () => {
    cy.visit('http://192.168.8.100:5173/')
    cy.get('h1').contains("Vite + React")
  })
})
First, it visits http://192.168.8.100:5173 and then looks for a h1 element that contains Vite + React
This test becomes successful because Cypress now knows where to navigate to locate the h1 tag.

If we have many h1 tags on the page this would be difficult to access, so let's use data- attributes to easily identify our elements for easy retrievability.
It is best practice to use a data- attribute.
<h1 data-test="Check vite">Vite + React</h1>
Then we update our test case
describe('Test react app', () => {
  it('checks for vite name', () => {
    cy.visit('http://192.168.8.100:5173/')
    cy.get('[data-test="Check vite"]').contains("Vite + React")
  })
})
You can see that the test is still successful.
Let's write another test to increment the count from 0 to 1
We add data-test="count button" to the button element and access it using cy.get() then we check if the button element contains a text count if it does it gets clicked.
describe('Test react app', () => {
  it('checks for vite name', () => {
    cy.visit('http://192.168.8.100:5173/');
    cy.get('[data-test="Check vite"]').contains('Vite + React');
  });
  it('clicks button', () => {
    cy.visit('http://192.168.8.100:5173/');
    cy.get('[data-test="count button"]').contains('count').click();
  });
});
The test passes and we can see our count is 1

In the cypress.config.js file, Let's set the baseUrl to http://192.168.8.100:5173 or whichever base URL is being used.
export default defineConfig({
  e2e: {
    setupNodeEvents(on, config) {
      // implement node event listeners here
    },
    baseUrl: 'http://192.168.8.100:5173/',
  },
});
Now we can use absolute URLs in cy.visit()
describe('Test react app', () => {
  it('checks for vite name', () => {
    cy.visit('/');
    cy.get('[data-test="Check vite"]').contains('Vite + React');
  });
  it('clicks button', () => {
    cy.visit('/');
    cy.get('[data-test="count button"]').contains('count').click();
  });
});
To avoid repeating cy.visit() on every it() block, we can leverage the Cypress beforeEach() command which like its name runs before each it() block is run.
beforeEach() accepts one argument — a call-back function
describe('Test react app', () => {
  beforeEach(() => {
    cy.visit('/');
  });
  it('checks for vite name', () => {
    cy.get('[data-test="Check vite"]').contains('Vite + React');
  });
  it('clicks button', () => {
    cy.get('[data-test="count button"]').contains('count').click();
  });
});
Now before each it() runs, Cypress visits the baseURL and we don't have to repeat cy.visit(/) every time.
Custom Commands
Cypress gives us the ability to create custom commands, this can come in handy when we want to simplify certain tests, avoid repetition, write logic and so many other things.
For instance, we can create a custom command to get data- attribute of elements using cy.get()
All custom commands created on Cypress should be done in the coomands.js file.
In the Cypress support folder, navigate to commands.js .
Cypress.Commands.add('getDataTest', (dataTest) => {
  return cy.get(`[data-test="${dataTest}"]`);
});
You see that this simply accepts a parameter dataTest and passes it to data-test in cy.get()
Now, we can use this command cy.getDataTest() and pass our datatest argument without repeating [data-test="datatest"] on the test cases.
describe('Test react app', () => {
  beforeEach(() => {
    cy.visit('/');
  });
  it('checks for vite name', () => {
    cy.getDataTest('Check vite').contains('Vite + React');
  });
  it('clicks button', () => {
    cy.getDataTest('count button').contains('count').click();
  });
});
The test is cleaner and passes.
Continuous integration via GitHub actions
Cypress has great documentation that talks about using GitHub actions and other CI tools to run tests.
We will do a walkthrough on how to run our test using GitHub actions on push.
Let's create a folder on the root of our React app folder .github/workflows and add a file called main.yml
Copy and paste this script into the file.
name: Cypress E2E Tests
on: [push]
jobs:
  cypress-run:
    runs-on: ubuntu-latest
    # Runs tests in parallel with matrix strategy https://docs.cypress.io/guides/guides/parallelization
    # https://docs.github.com/en/actions/using-jobs/using-a-matrix-for-your-jobs
    # Also see warning here https://github.com/cypress-io/github-action#parallel
    steps:
      - name: Checkout
        uses: actions/checkout@v3
      - name: Cypress run
        # Uses the official Cypress GitHub action https://github.com/cypress-io/github-action
        uses: cypress-io/github-action@v6
        with:
          browser: chrome
          # Starts web server for E2E tests - replace with your own server invocation
          # https://docs.cypress.io/guides/continuous-integration/introduction#Boot-your-server
          start: npm run dev
          wait-on: 'http://localhost:5173/' # Waits for above
This script runs whenever we push a change to our GitHub repo.
name - Name of the workflow
on - Can be push, pull requests e.t.c
Jobs- lists the actions to be taken by this workflow
runs-on - The virtual system it runs on
By default
cypress-io/github-action@v6installs all dependencies so there is no need to add that in the stepsYou can add a default browser to use for the test or just leave it
Enter the command you use to start your application, for this test we use
npm run devThen we enter the base URL where the app runs it could be
http://localhost:3000or in this casehttp://localhost:5173
To test this out let's create a new repo on Github and push our code. If you already have an existing repo then you can just push the code to the repo.
Click on the Actions tab of the repo to see the ongoing test

Click on the workflow run to see more details about the ongoing test, including information about its success or failure.
A successful test looks like this

Anytime we push a new commit to our repo, the test runs.
We can also modify the main.yml file to run only when pull requests are made to any branch or a specific branch
on:
  pull_request:
    branches:
      - staging
Cypress Cloud
Cypress Cloud serves as a comprehensive dashboard provided by Cypress, enabling the monitoring, analysis, replay, and tracking of test results. It is a valuable tool for troubleshooting failed tests.
Create a Cypress cloud account, and follow the onboarding prompts which require us to add a project ID to the cypress.config.js file.
Next, select GitHub actions from the provider list.
Copy the CYPRESS_RECORD_KEY and add it to your GitHub repository.
To add this, navigate to settings on the repo, click on Secrets and Variables then select Actions and add a new secret.
In the main.yml file, update the file to this
name: Cypress E2E Tests
on: [push]
jobs:
  cypress-run:
    runs-on: ubuntu-latest
    # Runs tests in parallel with matrix strategy https://docs.cypress.io/guides/guides/parallelization
    # https://docs.github.com/en/actions/using-jobs/using-a-matrix-for-your-jobs
    # Also see warning here https://github.com/cypress-io/github-action#parallel
    steps:
      - name: Checkout
        uses: actions/checkout@v3
      - name: Cypress run
        # Uses the official Cypress GitHub action https://github.com/cypress-io/github-action
        uses: cypress-io/github-action@v6
        with:
          browser: chrome

          # Starts web server for E2E tests - replace with your own server invocation
          # https://docs.cypress.io/guides/continuous-integration/introduction#Boot-your-server

          start: npm run dev
          wait-on: 'http://localhost:5173/' # Waits for above

          # Records to Cypress Cloud
          # https://docs.cypress.io/guides/cloud/projects#Set-up-a-project-to-record
          record: true
          parallel: true # Runs test in parallel using settings above
        env:
          # For recording and parallelization to work you must set your CYPRESS_RECORD_KEY
          # in GitHub repo → Settings → Secrets → Actions
          CYPRESS_RECORD_KEY: ${{ secrets.CYPRESS_RECORD_KEY }}
          # Creating a token https://docs.github.com/en/authentication/keeping-your-account-and-data-secure/creating-a-personal-access-token
          GITHUB_TOKEN: ${{ secrets.GITHUB_TOKEN }}
record:true enables recording and env allows us to add environment variables. Don't forget to add other env variables that would be required to get your app running here.
You can read here how to generate a GitHub token on your GitHub account.
After this has been updated, push the code and see if it reflects on Cypress cloud
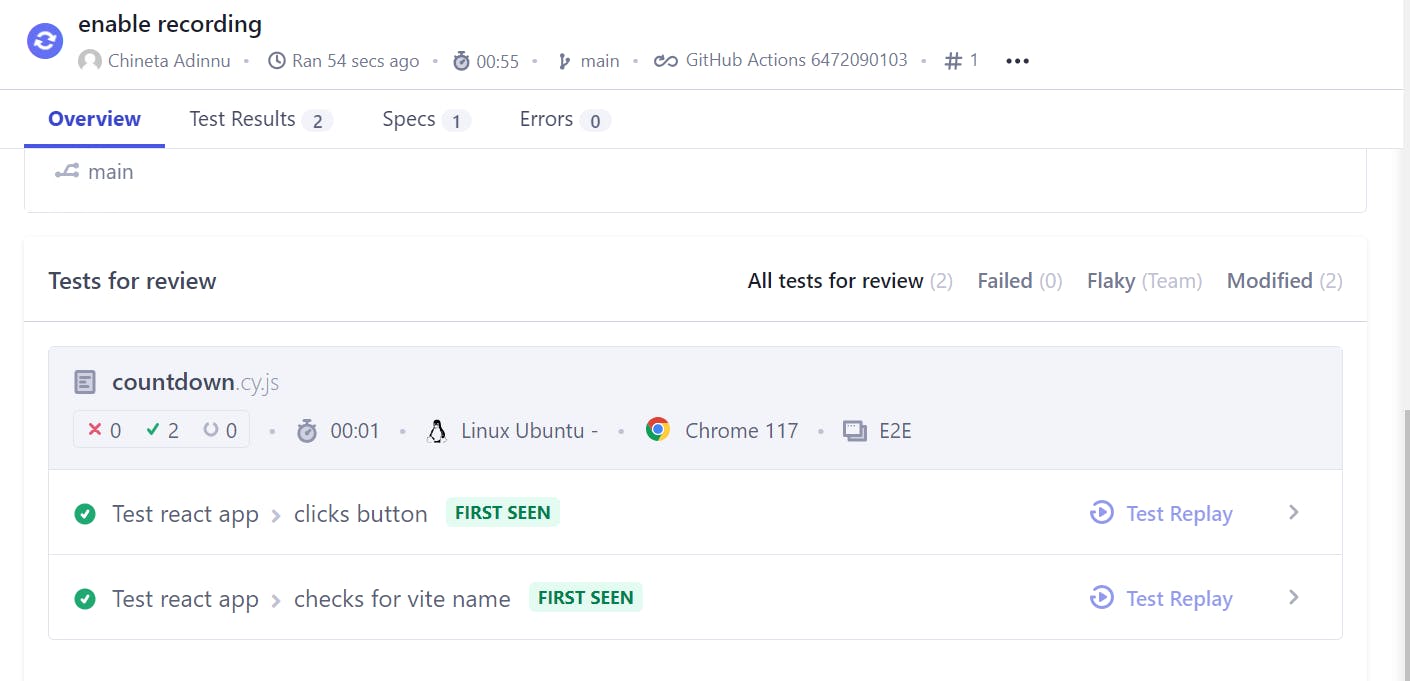
We can view the test on Cypress Cloud and even watch test replays if needed.
Cypress Cloud offers an array of excellent capabilities that enhance testing efficiency.
Before concluding, let's intentionally fail a test to observe how it appears on the cloud. I'll comment beforeEach on the test file
describe('Test react app', () => {
  // beforeEach(() => {
  //   cy.visit('/');
  // });
  it('checks for vite name', () => {
    cy.getDataTest('Check vite').contains('Vite + React');
  });
  it('clicks button', () => {
    cy.getDataTest('count button').contains('count').click();
  });
});
We can see the test fails on push

And it also gets recorded on Cypress Cloud

Now we can watch the replay to pinpoint the precise moment the test failed and troubleshoot the root cause.
Conclusion
This article covered the fundamental steps for integrating Cypress into a React app, writing basic tests, creating custom commands, setting up continuous integration through GitHub Actions, and integrating with Cypress Cloud.
Cypress provides a comprehensive suite of commands that significantly simplify testing front-end applications, empowering developers to create robust and efficient tests.
In another article, we'll explore how to utilize Cypress for stubbing endpoints and mocking data allowing for even more robust and comprehensive testing.
I hope you found this article helpful and gained valuable insights. Feel free to drop a comment and share your thoughts. 😁